How to Remove Butterfly Back Earrings: A Simple Guide for First-Timers
Removing butterfly back earrings can seem like a daunting task, especially if they are stuck or have been in place for a long time. Nevertheless, it’s a simple process that can be done safely and quickly with careful handling. The key is to maintain a clean environment to prevent any infections, especially if your piercings are relatively new or sensitive.
Earrings Deals – Brilliant Designs, Smart Prices!
To begin with, it is essential to ensure that your hands are thoroughly washed with antibacterial soap to avoid transferring any germs to your earlobes. Equally important is the cleanliness of your earrings and the area around your piercings. It's advisable to soak the butterfly back earrings in warm, saline water before attempting to remove them. This step can help to dislodge any build-up and make the process smoother.
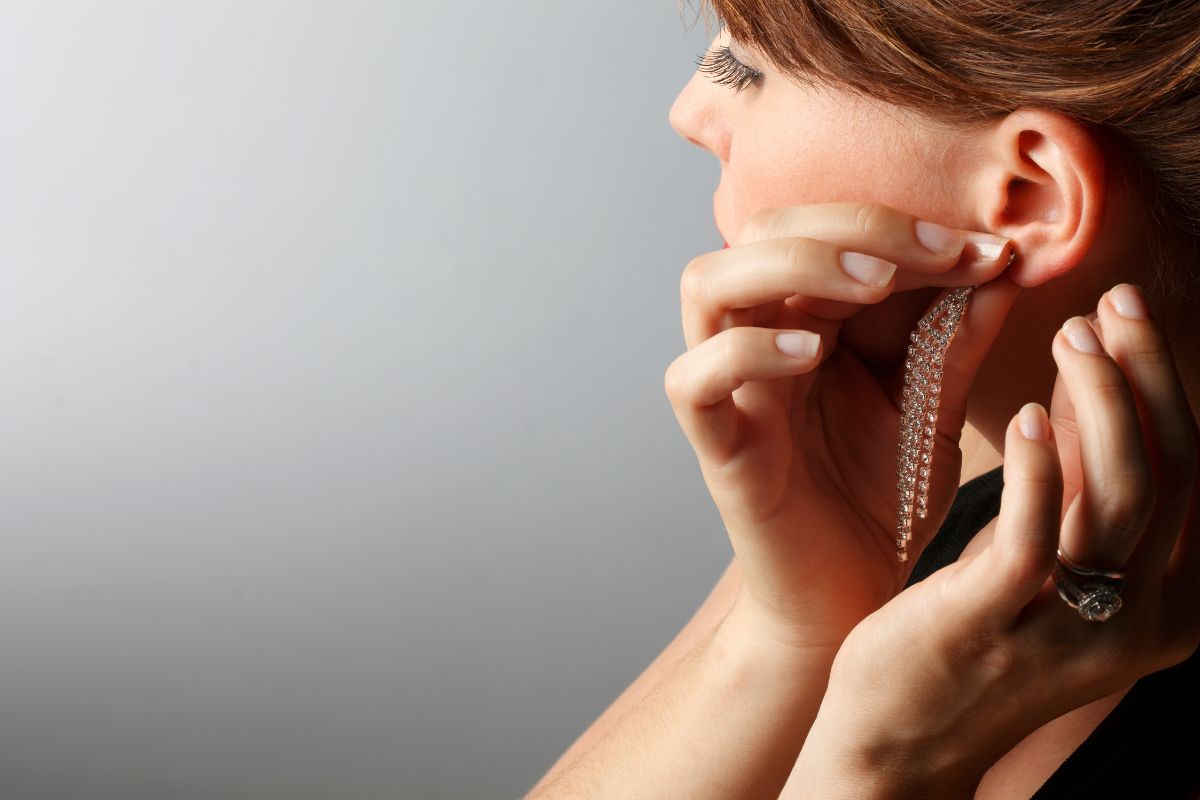
Once you have prepared and sanitized both your hands and the earrings, you can proceed to gently grasp the front part of the earring with one hand while using the other to carefully release the butterfly backing. Steady motions and a bit of patience are crucial to avoid damage to your earlobes or the earrings themselves. If resistance is felt, refrain from forcing the earring off and try soaking for an additional few minutes before trying again.
Visit Our Diamond Pendant Collection


Understanding Butterfly Back Earrings
When selecting earrings, particularly stud earrings, it's crucial to understand the different backing options available to you. The butterfly back is a common and reliable choice. Let's explore the components and types of earring backs.
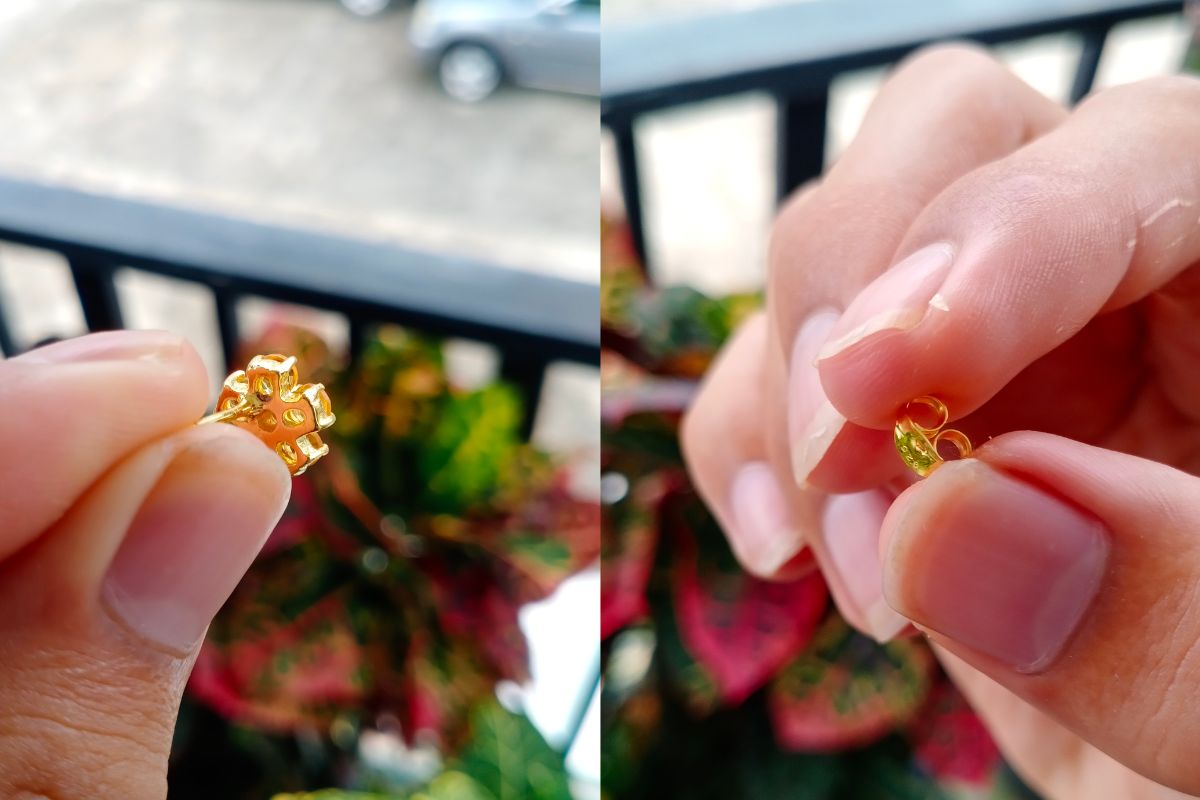
Anatomy of Butterfly Back Earrings
Butterfly back earrings consist of two main parts: the stud and the backing itself. The stud is the decorative front piece that sits on the front of your earlobe. The backing, shaped like a butterfly with two metal tabs or "wings" that squeeze together, slides onto the post of the stud earring and holds it in place. You typically find butterfly earring backs on a range of stud earrings due to their ease of use and secure fit.
Types of Earring Backs
1. Butterfly Backs
Also known as friction backs, these earring backs feature a small metal piece with two loops that fold together to secure the earring in place.
2. Screw Backs
Screw backs have a threaded post that screws into a corresponding threaded nut to secure the earring. They provide extra security but may take longer to put on.
3. Push Backs
Push backs are simple and easy to use. They consist of a straight post that slides into a small metal piece with a hole, creating tension to hold the earring in place.
4. Lever Backs
Lever backs feature a hinged closure that snaps shut behind the earlobe, providing a secure fit while adding an elegant touch to the earring design.
5. Latch Backs
Latch backs have a hinged lever that opens and closes, securing the earring in place. They offer both security and ease of use.
It's important to consider your personal needs, such as comfort, security, and ease of use, when deciding which type of earring back is right for you.
Preparation for Removal
Before attempting to remove your butterfly back earrings, it's crucial to ensure a hygienic environment and have the appropriate tools on hand to avoid any complications.
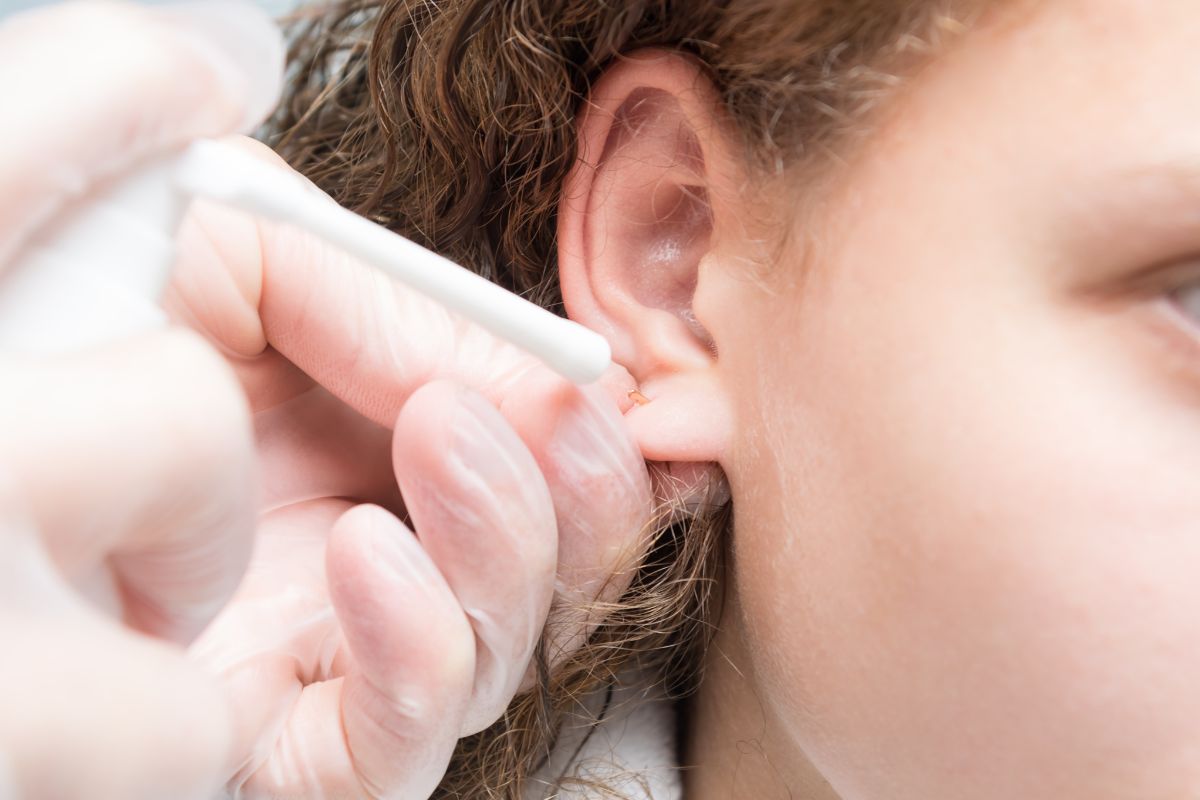
Cleaning and Disinfecting
To minimize the risk of infections, it's important to disinfect your hands and the earrings themselves. You should:
- Wash your hands thoroughly with antibacterial soap and warm water.
- Dab a cotton swab with rubbing alcohol or hydrogen peroxide and carefully disinfect both the earring and the butterfly back.
Gathering the Necessary Tools
Having the right tools ready can make the removal process smooth and comfortable. You will need:
- Tweezers or needle nose pliers to carefully hold the earring back if it's too small to grasp.
- Additional cotton swabs or a clean cloth for handling your earrings after disinfection.
By following these steps, you’re setting yourself up for a safe and clean earring removal experience.
Removing Butterfly Back Earrings
Understanding the correct method to remove butterfly back earrings is crucial to avoid causing discomfort to your earlobes, as well as potential damage to your earrings. It is important to approach the process with patience and use the right tools to ensure a safe removal process.
Step-by-Step Guide for Safe Removal
- Wash Your Hands: Begin by thoroughly washing your hands with antibacterial soap to avoid introducing bacteria to the pierced area.
- Prepare Your Earrings: If necessary, you can clean your earrings while they are still in your ears. A saline solution or warm soapy water can help to loosen any debris.
- Initiate Removal:
- Gently hold the front part of the earring.
- With your other hand, grasp the butterfly back and pinch it slightly to release its grip before you start to gently slide it off the post.
- Remove the Earring: Hold the post of the earring with one hand. Apply a steady, gentle pressure to slide the butterfly back off the post with the other hand.
- Clean After Removal:
- Once removed, use a cotton swab dipped in rubbing alcohol or saline solution to clean both the earring and your earlobe.
- Pat the area dry with a clean, soft towel.
Handling Stuck Earring Backs
In Case of a Stuck Earring Back:
- Apply a Lubricant:
- Gently apply a small amount of petroleum jelly, olive oil, or Vaseline to the earring post and back to lubricate the area.
- Use Proper Tools:
- If necessary, use clean tweezers to carefully grasp and maneuver the earring back.
- Technique Matters:
- It is important not to pull or force the earring; a slow, gentle twist may help in loosening the butterfly back.
- If you feel any discomfort or if the earring does not come loose, stop and seek professional help from a piercer or a healthcare provider.
Tips to Prevent Future Issues:
- Always ensure that the earring backs are not pushed too tightly against your skin tissue when putting them on.
- Regular cleaning of the earrings can prevent buildup that could result in the butterfly backs becoming stuck.
Post-Removal Care
After removing butterfly back earrings, it's crucial to maintain the health of your piercing. Proper aftercare minimizes the risk of infection and ensures the area heals well.
Preventing Infections
To prevent infections:
- Clean hands: Always wash your hands with antibacterial soap before touching the piercing site.
- Saline solution: Clean the area with a saline solution twice a day.
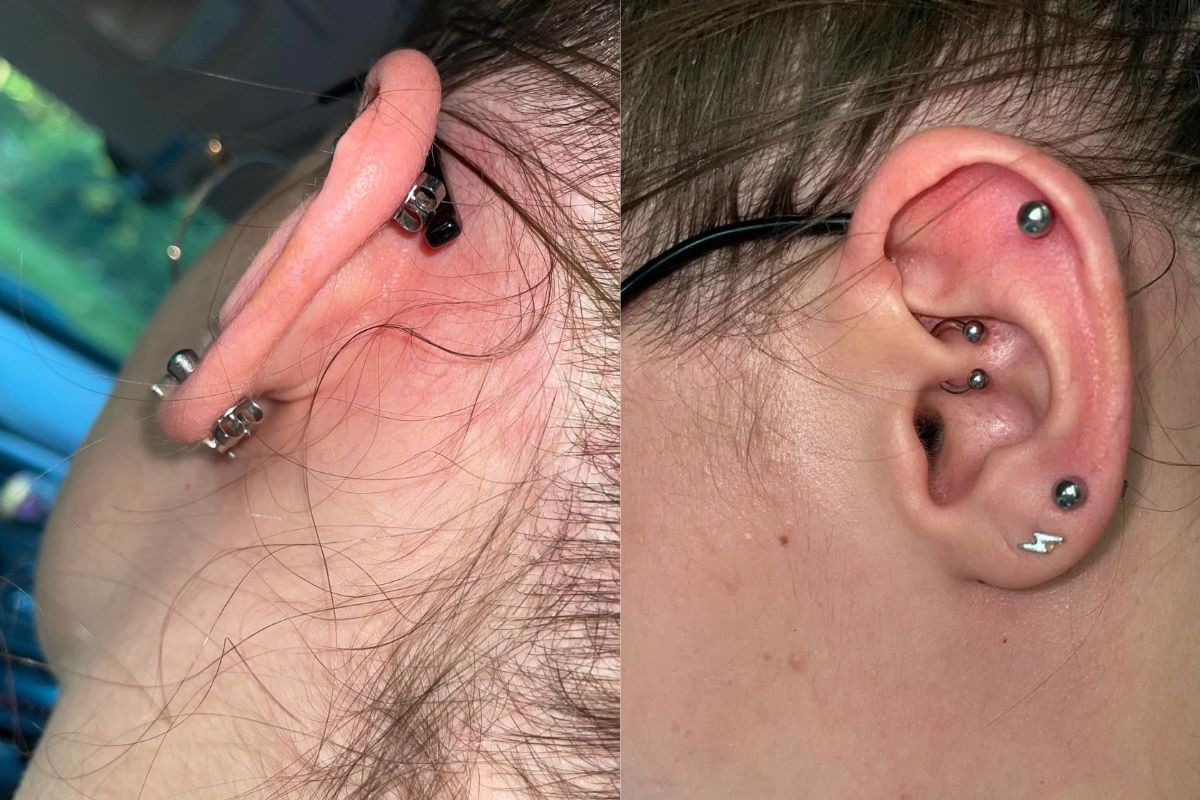
For cartilage piercings, be extra cautious as they are more prone to complications.
Dealing with Complications
If complications arise:
- Monitor: Watch for signs of infection such as persistent redness, swelling, or severe pain.
- React: If symptoms persist, it’s essential to seek professional help either from your piercer or a medical professional.
Keep contact information for customer service of the piercing studio for easy access in case you encounter any complications. Their guidance paired with successful aftercare practices will reduce the risk of issues in a freshly pierced ear.
Maintenance and Storage
Proper maintenance and storage of your butterfly back earrings are essential to ensure their longevity and prevent rusting. Neglect can lead to damage, while careful attention preserves their quality and appearance.
Cleaning and Storing Earring Backs
Cleaning: To keep your earring backs in top condition, you should clean them regularly. For butterfly backs, use a gentle, non-abrasive soap and warm water. Follow these steps:
- Soak your earring backs in a solution of soapy water for a few minutes.
- Gently brush them with a soft-bristled toothbrush to remove any dirt or build-up.
- Rinse with clean water and dry thoroughly with a soft, lint-free cloth.
Storing: After cleaning, store your earring backs separately from other jewelry to prevent scratching. Use a:
- Soft-padded jewelry box or
- Individual compartments within a storage container
Keeping your earring backs in a dry environment will also minimize the chances of rusting.
Preventing Rust and Longevity
Rust Prevention: To prevent rust, especially on new earrings or safety back earrings, keep your earring backs dry and free from humidity. Consider these tips:
- Avoid wearing earrings while showering, swimming, or exercising.
- Apply a thin coat of clear nail polish to the backs to create a barrier against moisture.
Longevity: Regular maintenance will significantly extend the life of your starter earrings and pierced ears accessories. Remember:
- Replace lost or damaged backs immediately to maintain the integrity of your earrings.
- Periodically check the tightness of butterfly backs to ensure they remain secure.
By following these specific practices, you will maintain the safety and aesthetic of your earrings for years to come.
Troubleshooting Common Issues
When removing butterfly back earrings, you may occasionally encounter issues that necessitate a little extra care and attention. The following subsections outline practical solutions to two common problems.
Difficulty with Butterfly Backs
If you find it difficult to remove butterfly back earrings due to tightness or debris build-up, there are precise steps you can follow:
- First, ensure your hands are clean to prevent infection.
- If the backs are too tight, soak the earring in warm saline water for a few minutes to loosen any debris.
- Gently hold the front part of the earring and steadying the butterfly back with your other hand, twist and pull straight back to remove them without causing discomfort to your pierced ears.
When to Replace Earring Backs
Worn-out or damaged earring backs can cause complications and should be replaced to ensure the safety and health of your pierced ears. Recognize when replacement is necessary:
- Examine the earring backs for signs of wear, such as bent metal or loose components.
- If butterfly back earrings no longer hold securely or cause discomfort, it's time to find new earring backs that fit snugly and comfortably.
Professional Assistance and Advice
When encountering issues with butterfly back earrings, it is imperative to understand when to seek professional help and how to select the right professional piercer for guidance and safely addressing any complications.
When to Consult a Professional
If you notice signs of infection such as redness, swelling, pain, or discharge at your earring site, it is crucial to seek professional help. An experienced piercer has the expertise to advise on proper care or to safely remove the earring if necessary. Complications with earrings, especially if they are stuck or causing discomfort, should not be ignored as they could exacerbate potential infections.
Selecting a Professional Piercer
When looking for a piercer, prioritize those who demonstrate a high level of customer service and hygiene practices. Key factors to consider:
- Ensure they hold a valid certification and follow industry-standard sterilization processes.
- Look for positive customer testimonials reflecting their commitment to safety and skill.
- Choose a professional who offers clear aftercare instructions and is available for follow-up questions or concerns regarding your ear piercing.
By carefully choosing a qualified professional piercer, you can maintain the health of your ear piercings and minimize the risk of complications.
Frequently Asked Questions
Removing butterfly back earrings for the first time or dealing with stuck earring backs can be a delicate process that requires patience and the right techniques to avoid injury or discomfort.
How do you take out butterfly earrings for the first time?
When removing butterfly earrings for the first time, ensure your hands are clean to prevent infection. Gently hold the front of the earring and slowly push the back towards the end of the post while applying a slight pulling force to detach it.
Why won't the back of my earring come off?
The back of your earring may not come off if it's tightened too much or if debris has built up between the earring and the back. Clean the area with a saline solution and gently wiggle the back to loosen it before attempting to remove it.
How do you remove locking back earrings?
For locking back earrings, hold the post with one hand and with the other hand, gently push the locking mechanism towards the earring before sliding it off. Avoid pulling without pushing the lock to prevent injury.
How to take off earrings that are stuck?
If earrings are stuck, apply a lubricant like olive oil to the area around the post and earring back to loosen it. After a few minutes, try wiggling the back gently to remove the earring without force.
How to remove earring backs without causing discomfort?
To remove earring backs without discomfort, apply a warm compress to the earlobe to soften the skin and potentially reduce swelling. Use clean hands and a gentle touch to carefully slide the earring back off the post.
What is the safest way to remove earrings with safety backs?
For earrings with safety backs, press down on the back while holding the front part of the earring steady. Simultaneously, pull the back out and away from the post, using a steady motion to safely remove the safety back without harm.
Checkout some of our top collections:

Leave a comment
Please note, comments must be approved before they are published.